Game day is all about fun, friends, and of course, fantastic food! These easy recipes will help you whip up crowd-pleasing snacks and meals without spending all day in the kitchen. From finger foods to hearty dishes, you’ll have everything you need to keep the good vibes rolling while you cheer for your favorite team.
Baked Ham and Cheese Sliders
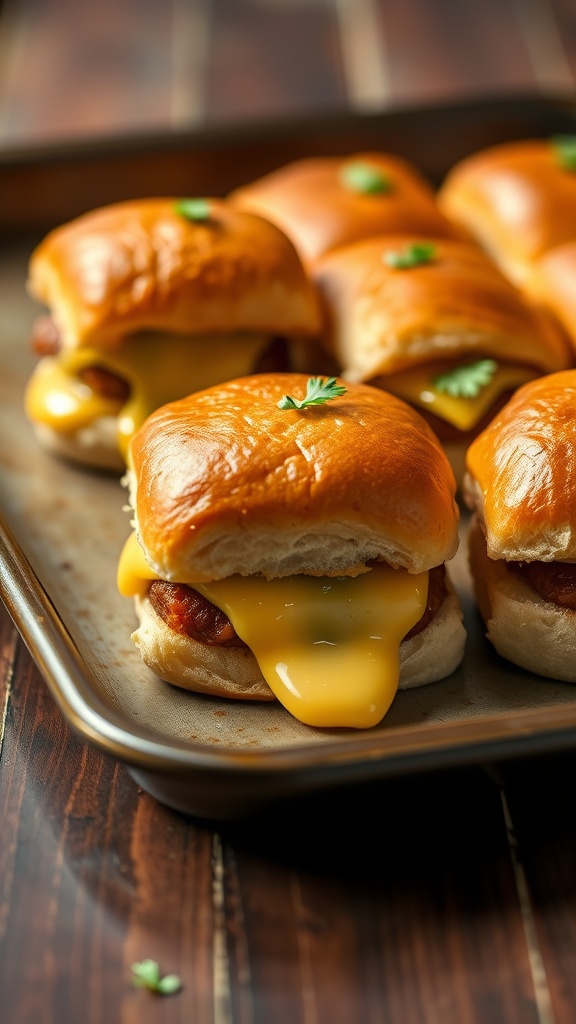
Baked ham and cheese sliders are a perfect game day treat that combines savory ham and gooey cheese in a soft, buttery bun. This dish is not only delicious but also super easy to prepare, making it an ideal choice for feeding a crowd.
The sliders are packed with flavor, thanks to a simple mix of ingredients, and they come together quickly. With a delightful crunch on top and a warm, melty center, these sliders are sure to be a hit at your next gathering!
Ingredients
- 12 slider buns
- 1 pound sliced ham
- 12 slices of cheese (Swiss or cheddar)
- 1/2 cup unsalted butter, melted
- 2 tablespoons Dijon mustard
- 1 tablespoon poppy seeds
- 1 teaspoon garlic powder
- Salt and pepper to taste
Instructions
- Preheat your oven to 350°F (175°C).
- In a bowl, mix the melted butter, Dijon mustard, poppy seeds, garlic powder, salt, and pepper.
- Cut the slider buns in half horizontally and place the bottom halves in a greased baking dish.
- Layer half of the ham slices over the bottom buns, followed by a slice of cheese on each. Add the remaining ham and top with the other cheese slices.
- Place the top halves of the buns on top and pour the butter mixture evenly over them.
- Cover with foil and bake for 15 minutes. Remove the foil and bake for an additional 10 minutes until the tops are golden brown.
- Slice and serve warm for a tasty game day snack!
Ham and Cheese Sliders with Hawaiian Rolls
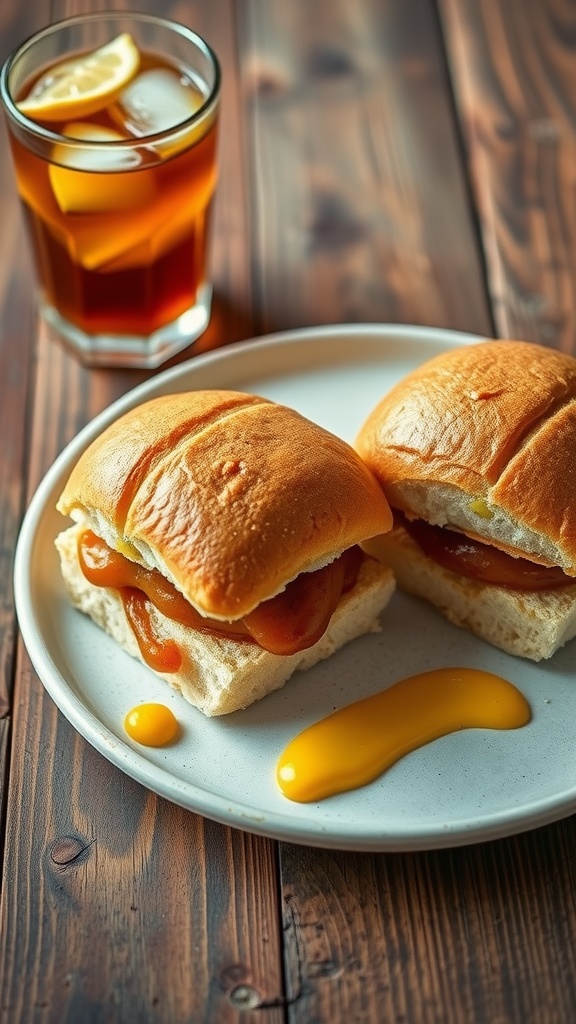
Ham and cheese sliders are the perfect addition to any game day gathering. These tasty treats are made using soft Hawaiian rolls, filled with layers of savory ham and melty cheese. The sweet rolls provide a delightful contrast to the salty filling, creating a flavor combination that everyone will love. Plus, they are super simple to prepare, making them an ideal choice for any busy host.
These sliders are not just delicious; they’re also easy to customize. You can switch up the meats or cheeses based on your preferences, and you can even add some toppings like pickles or mustard for an extra kick. Bake them until golden and bubbly, and watch them disappear as guests reach for seconds!
Ingredients
- 12 Hawaiian rolls
- 1 pound sliced ham
- 12 slices of cheddar cheese
- 1/2 cup unsalted butter, melted
- 2 tablespoons Dijon mustard
- 1 tablespoon poppy seeds (optional)
- 1 teaspoon garlic powder
Instructions
- Preheat your oven to 350°F (175°C).
- Slice the Hawaiian rolls in half, keeping them connected. Place the bottom half in a baking dish.
- Layer the ham and cheese on the bottom half of the rolls.
- In a small bowl, mix melted butter, Dijon mustard, garlic powder, and poppy seeds. Brush this mixture generously over the tops of the rolls.
- Cover with foil and bake for 15 minutes. Then remove the foil and bake for an additional 10 minutes, or until the cheese is melted and the tops are golden.
- Slice apart and serve warm. Enjoy your sliders during the game!
Honey Mustard Ham and Cheese Sliders
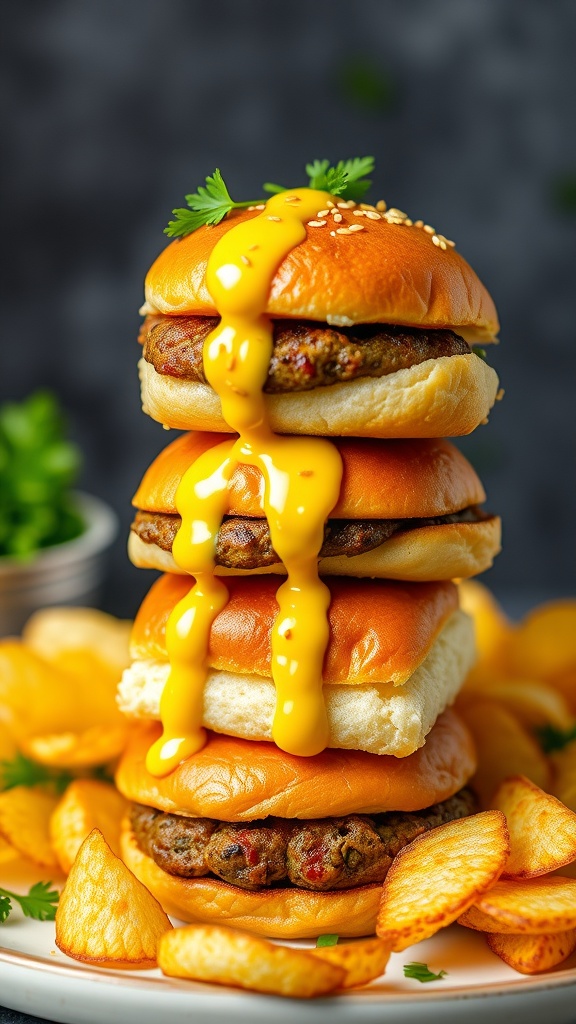
These Honey Mustard Ham and Cheese Sliders are a perfect addition to any game day spread. With their sweet and tangy honey mustard sauce paired with savory ham and melted cheese, they create a delightful bite that everyone will love. Plus, they’re easy to whip up, making them ideal for last-minute preparations or casual gatherings.
The combination of soft slider buns and the gooey cheese offers a comforting touch, while the honey mustard adds a unique flavor twist. Whether you’re hosting a party or just enjoying a cozy evening at home, these sliders are sure to satisfy your cravings!
Ingredients
- 12 slider buns
- 1 pound deli ham, sliced
- 8 slices Swiss cheese
- 1/4 cup honey
- 1/4 cup Dijon mustard
- 1/4 cup unsalted butter, melted
- 1 tablespoon poppy seeds (optional)
Instructions
- Preheat your oven to 350°F (175°C).
- In a small bowl, mix together the honey and Dijon mustard until well combined.
- Place the bottom half of the slider buns in a greased baking dish. Layer the ham and Swiss cheese on top of the buns.
- Drizzle half of the honey mustard mixture over the cheese and ham, then place the top half of the sliders on.
- In another bowl, combine the melted butter and poppy seeds, then brush this mixture over the tops of the slider buns.
- Bake in the preheated oven for about 15-20 minutes, or until the cheese is melted and the tops are golden brown.
- Remove from the oven, drizzle with the remaining honey mustard, slice, and serve warm.
Pepperoni Pizza Sliders
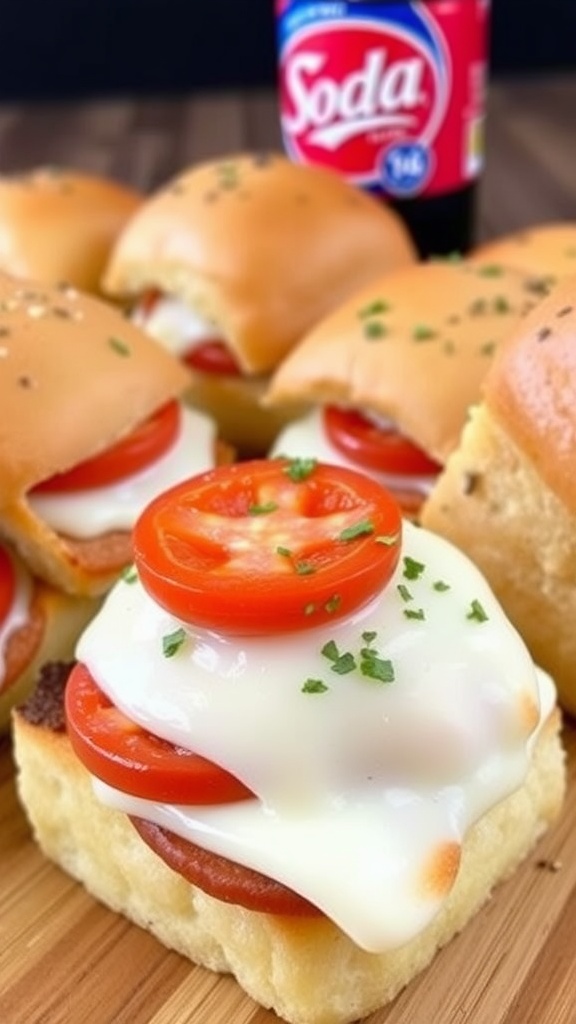
These Pepperoni Pizza Sliders are a perfect addition to your game day spread. They come together easily and pack a punch with their cheesy, savory flavor. With layers of pepperoni, mozzarella, and fresh tomatoes, they’re a crowd-pleaser that everyone will love.
These sliders are incredibly simple to prepare. Just layer your ingredients between soft slider buns, warm them in the oven, and you’re ready to serve! They offer all the deliciousness of a pizza in a cute, easy-to-eat package.
Ingredients
- 12 slider buns
- 2 cups mozzarella cheese, shredded
- 1 cup pepperoni slices
- 1 large tomato, sliced
- 1/2 cup pizza sauce
- 1 tablespoon Italian seasoning
- 2 tablespoons olive oil
Instructions
- Preheat your oven to 350°F (175°C).
- Slice the slider buns in half and place the bottom half in a baking dish.
- Spread pizza sauce on the bottom half of the buns.
- Layer with mozzarella cheese, pepperoni, and tomato slices.
- Sprinkle Italian seasoning over the top.
- Place the top half of the buns back on and brush with olive oil.
- Bake for about 15 minutes or until the cheese is melted and the buns are golden brown.
- Serve warm and enjoy!
Hot Ranch Sausage Dip
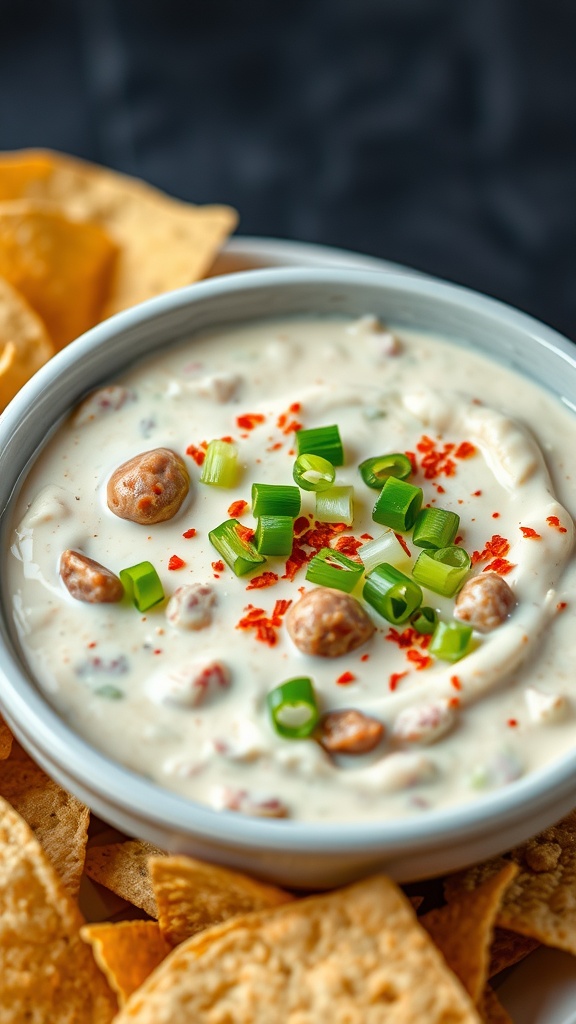
Hot Ranch Sausage Dip is the perfect addition to your game day spread. This creamy, flavorful dip combines savory sausage with a zesty ranch flavor, making it a hit at any gathering. It’s easy to whip up and is sure to please both casual snackers and serious foodies alike.
With just a few simple ingredients, you can create a delicious dip that pairs wonderfully with chips, veggies, or even bread. It’s a great way to bring some excitement to your snack table, and your friends will definitely be asking for the recipe!
Ingredients
- 1 pound ground sausage
- 8 ounces cream cheese, softened
- 1 cup sour cream
- 1 cup shredded cheddar cheese
- 1 packet ranch seasoning mix
- 1/4 cup diced green onions
- 1/4 teaspoon red pepper flakes (optional)
- Tortilla chips or veggies for serving
Instructions
- Cook the Sausage: In a skillet over medium heat, cook the ground sausage until browned. Drain any excess fat.
- Mix the Dip: In a large bowl, combine the cooked sausage, cream cheese, sour cream, cheddar cheese, and ranch seasoning mix. Mix until smooth.
- Heat the Mixture: Transfer the mixture to a baking dish and bake at 350°F (175°C) for about 20 minutes, or until hot and bubbly.
- Garnish and Serve: Sprinkle with diced green onions and red pepper flakes if desired. Serve warm with tortilla chips or veggies.
Hot Sausage Cream Cheese Rotel Dip
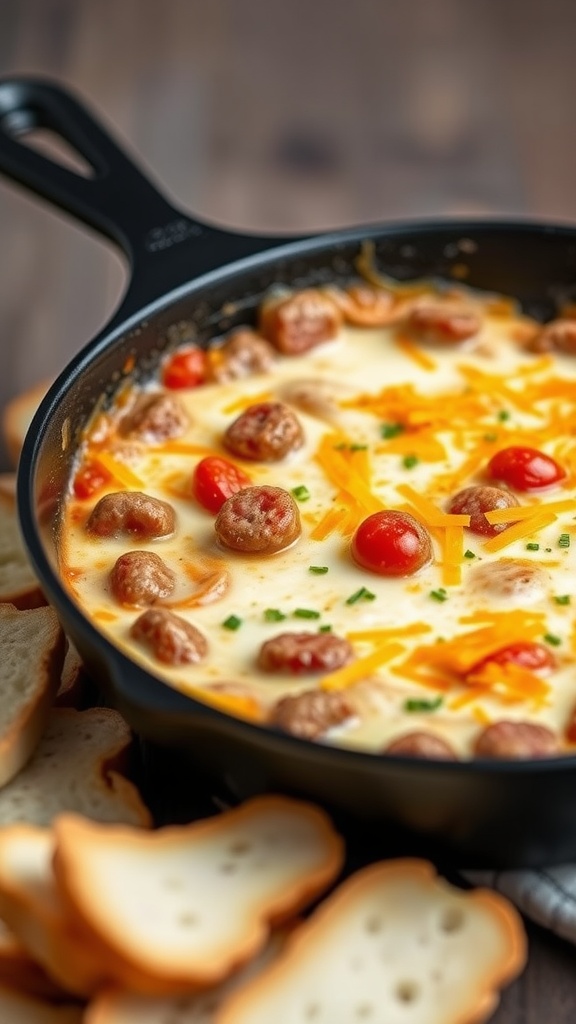
This Hot Sausage Cream Cheese Rotel Dip is a real crowd-pleaser, perfect for game day gatherings. With its creamy texture and a hint of spice, it’s a flavor-packed dip that everyone will love. It’s super simple to whip up, making it an ideal choice for last-minute snacks or planned parties.
The combination of savory sausage, rich cream cheese, and zesty Rotel tomatoes creates a mouthwatering experience that pairs well with tortilla chips or toasted bread. This dip is sure to be the highlight of your game day spread!
Ingredients
- 1 pound ground sausage
- 1 (8 oz) package cream cheese, softened
- 1 (10 oz) can Rotel diced tomatoes with green chilies
- 1 cup shredded cheddar cheese
- 1/2 teaspoon garlic powder
- 1/2 teaspoon onion powder
- Tortilla chips or sliced bread for serving
Instructions
- Cook the Sausage: In a skillet over medium heat, brown the ground sausage until fully cooked. Drain excess grease.
- Mix the Dip: Lower the heat and add the softened cream cheese to the skillet. Stir until melted and well combined with the sausage.
- Add Rotel: Stir in the can of Rotel tomatoes, garlic powder, and onion powder. Mix well and let it simmer for about 5 minutes.
- Cheese it Up: Remove the skillet from heat and sprinkle the shredded cheddar cheese on top. Let it melt slightly before serving.
- Serve: Enjoy the dip warm with tortilla chips or sliced bread.
Sausage Pizza Dip
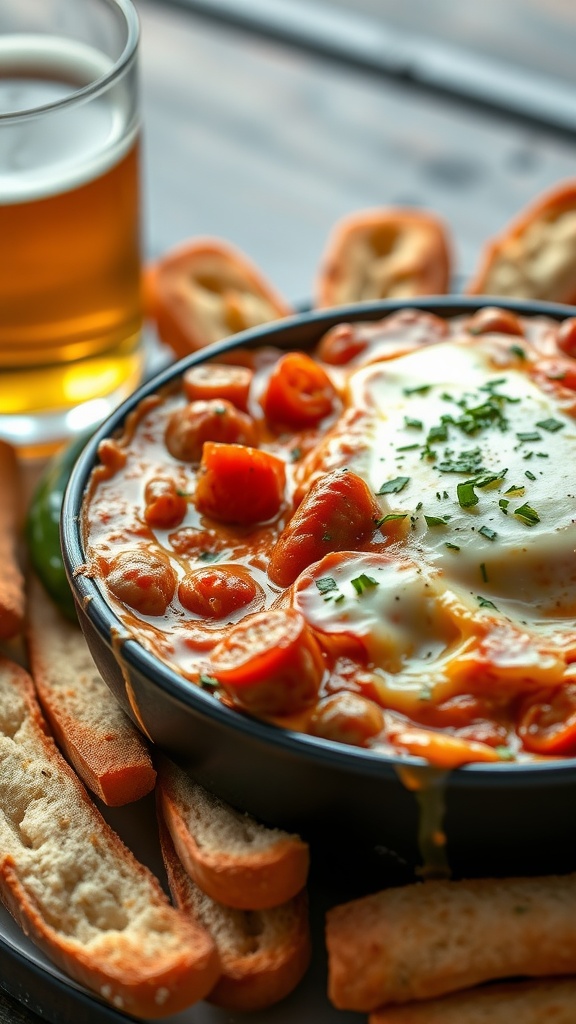
Sausage pizza dip is a warm, cheesy delight that’s perfect for game day gatherings. It combines the rich flavors of Italian sausage, zesty tomatoes, and creamy cheese, creating a dip that’s both savory and satisfying. Everyone will love scooping it up with crispy bread or tortilla chips!
This dish is super easy to whip up and doesn’t require any complicated techniques. It’s all about layering flavors and letting the oven do the work. Whether you’re hosting a party or just want a tasty snack, this dip is sure to please!
Ingredients
- 1 pound Italian sausage
- 1 cup cream cheese, softened
- 1 cup shredded mozzarella cheese
- 1 cup pizza sauce
- 1 teaspoon Italian seasoning
- 1/2 cup grated parmesan cheese
- Chopped green onions for garnish
- Crispy bread or tortilla chips for serving
Instructions
- Preheat your oven to 350°F (175°C).
- In a skillet, brown the Italian sausage over medium heat until fully cooked. Drain excess fat.
- In a mixing bowl, combine the cooked sausage, cream cheese, mozzarella cheese, pizza sauce, and Italian seasoning. Mix until well blended.
- Transfer the mixture to a baking dish and sprinkle the parmesan cheese on top.
- Bake for 20-25 minutes, or until the dip is bubbly and golden on top.
- Remove from the oven and let it cool slightly. Garnish with chopped green onions and serve warm with crispy bread or chips.
Queso Dip
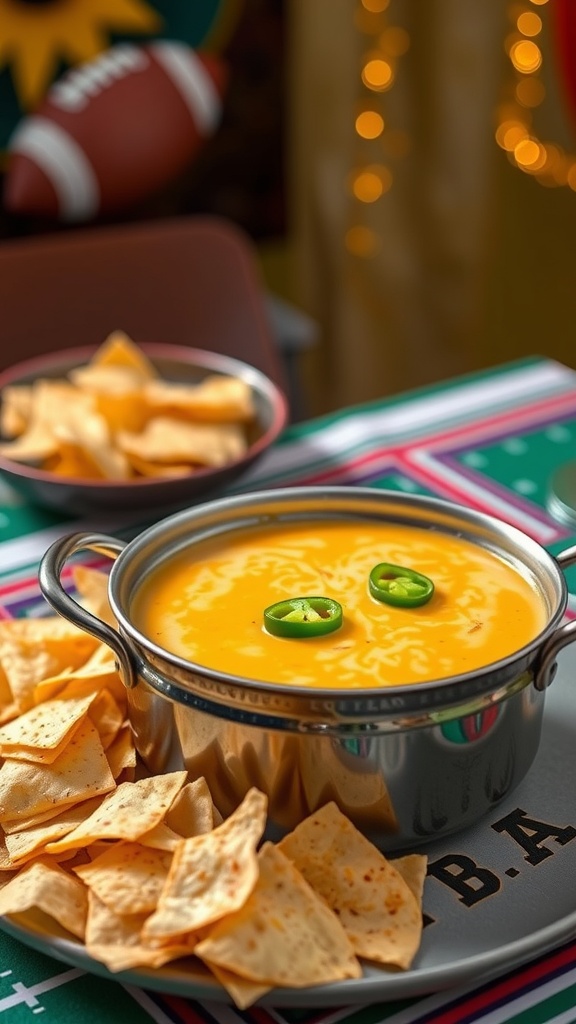
Queso dip is a perfect addition to any game day spread. This creamy, cheesy delight packs a savory punch and is incredibly easy to whip up. With just a few ingredients, you can create a dip that will have everyone reaching for more.
It’s smooth, cheesy, and can be spiced up with jalapeños or kept mild for the kids. Serve it warm with tortilla chips for a delicious combination that’s sure to be a hit. Plus, it’s one of those recipes that takes minimal effort but delivers maximum flavor, making it a go-to for any casual gathering.
Ingredients
- 2 cups shredded cheddar cheese
- 1 cup cream cheese
- 1 cup milk
- 1 can diced tomatoes with green chilies, drained
- 1 teaspoon garlic powder
- 1 teaspoon onion powder
- 1-2 jalapeños, sliced (optional)
- Tortilla chips for serving
Instructions
- In a medium saucepan over low heat, combine the cream cheese and milk. Stir until the cream cheese is melted and the mixture is smooth.
- Add the shredded cheddar cheese, stirring constantly until melted and well combined.
- Stir in the diced tomatoes, garlic powder, onion powder, and jalapeños (if using). Cook for an additional 2-3 minutes, until everything is heated through.
- Remove from heat and transfer to a serving bowl. Enjoy with tortilla chips!
Jalapeno Popper Dip
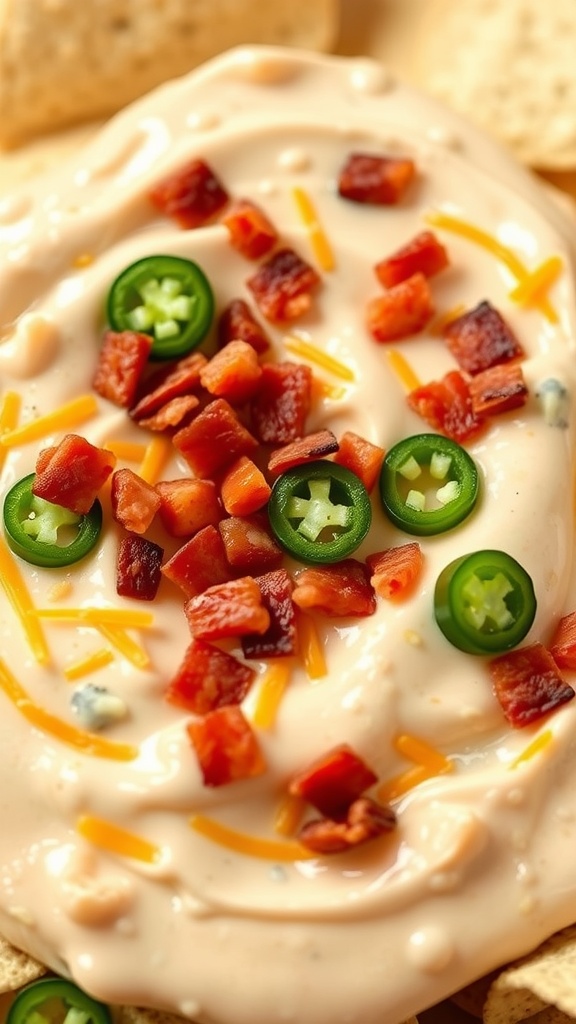
This Jalapeno Popper Dip brings all the flavors of your favorite game day snack into one easy-to-make dish. Creamy, cheesy, and just the right amount of spicy, it’s perfect for sharing with friends while catching the big game. Whether you’re a fan of football or just love a good dip, this recipe is a crowd-pleaser that’s simple enough for anyone to whip up.
With its combination of cream cheese, jalapenos, and crispy bacon, each bite is bursting with flavor. Serve it hot, and pair it with tortilla chips or your favorite crackers for a tasty treat that will have everyone coming back for more.
Ingredients
- 1 (8 oz) package cream cheese, softened
- 1 cup sour cream
- 1 cup shredded cheddar cheese
- 1/2 cup diced jalapenos (fresh or pickled)
- 1/2 cup cooked bacon, chopped
- 1 teaspoon garlic powder
- 1 teaspoon onion powder
- 1/2 teaspoon smoked paprika
- Salt and pepper to taste
- Tortilla chips or crackers for serving
Instructions
- Preheat the oven to 350°F (175°C).
- In a medium bowl, combine softened cream cheese, sour cream, and shredded cheddar cheese. Mix until smooth.
- Stir in diced jalapenos, chopped bacon, garlic powder, onion powder, smoked paprika, salt, and pepper. Mix well to combine.
- Transfer the mixture to a baking dish and spread it evenly.
- Bake for 20-25 minutes, or until the dip is hot and bubbly.
- Remove from the oven and let it cool slightly before serving with tortilla chips or crackers.
Loaded Potato Skins
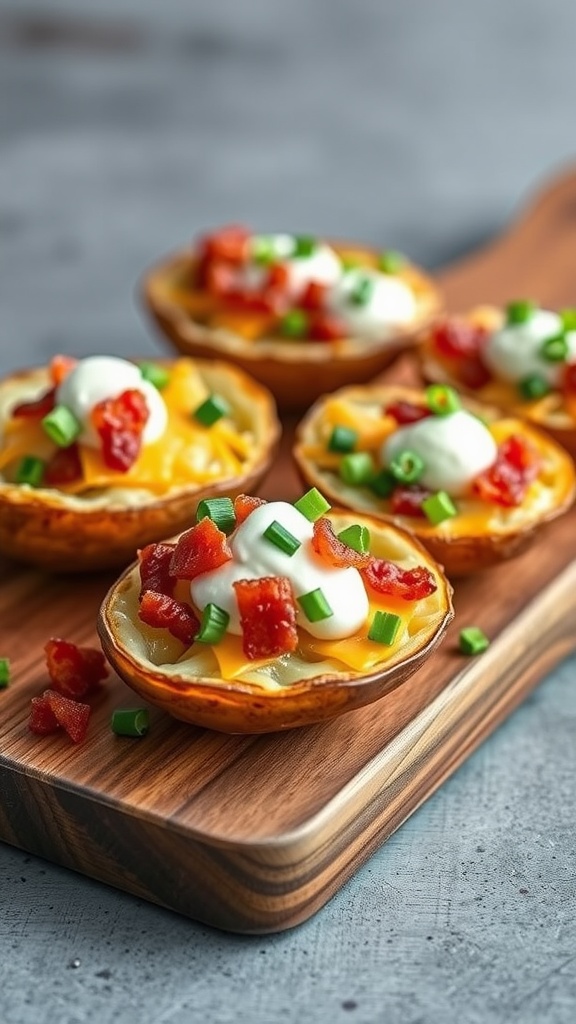
Loaded potato skins are a crowd-pleasing snack that packs a punch of flavor. Crispy on the outside and fluffy on the inside, these potato halves are topped with melty cheese, crispy bacon, and fresh green onions, offering a delightful combination of textures and tastes. They’re perfect for game day gatherings or any casual get-together.
This recipe is easy to whip up, making it a go-to for both novice and experienced cooks. With just a few ingredients, you’ll have a delicious finger food that will keep everyone coming back for more.
Ingredients
- 4 large russet potatoes
- 1 cup shredded cheddar cheese
- 1/2 cup cooked bacon, crumbled
- 1/2 cup sour cream
- 1/4 cup green onions, chopped
- Salt and pepper to taste
- Olive oil
Instructions
- Preheat your oven to 400°F (200°C). Wash and scrub the potatoes, then prick them with a fork a few times. Rub with olive oil and sprinkle with salt.
- Bake the potatoes directly on the oven rack for about 45-60 minutes, or until fork-tender. Remove and let cool slightly.
- Once cool enough to handle, cut each potato in half lengthwise and scoop out some of the insides, leaving about 1/4 inch of flesh.
- Brush the inside of each potato skin with olive oil and season with salt and pepper. Turn them cut-side down on a baking sheet and bake for another 10-15 minutes until crispy.
- Flip the skins and fill each with cheddar cheese and crumbled bacon. Return to the oven until the cheese is melted.
- Remove from the oven and top with sour cream and chopped green onions before serving.
Baked Parmesan Mozzarella Bites
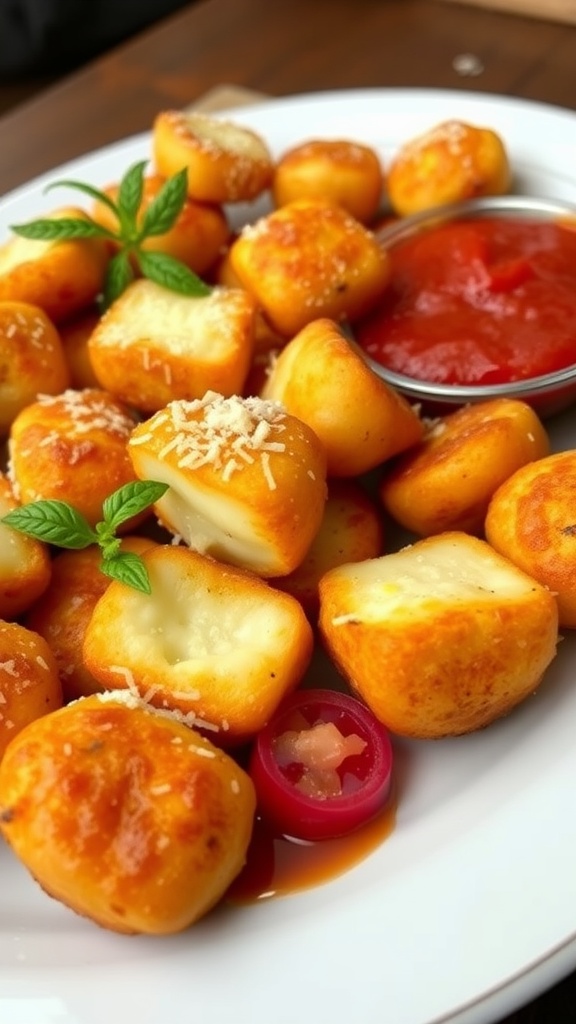
Baked Parmesan Mozzarella Bites are the perfect game day snack that everyone will love. These cheesy, golden bites are crispy on the outside and gooey on the inside, delivering a burst of flavor with every bite. They are simple to make, using just a few ingredients that you probably already have in your kitchen.
Pair these delicious bites with marinara sauce for dipping, and you have a snack that’s sure to be a crowd-pleaser. Whether you’re watching the big game or hosting a casual get-together, these bites are an easy way to keep your guests happy!
Ingredients
- 1 cup shredded mozzarella cheese
- 1/4 cup grated Parmesan cheese
- 1/2 cup all-purpose flour
- 1/2 teaspoon garlic powder
- 1/2 teaspoon dried oregano
- 1/4 teaspoon salt
- 1 egg, beaten
- 1/2 cup breadcrumbs
- Marinara sauce for dipping
Instructions
- Preheat your oven to 400°F (200°C) and line a baking sheet with parchment paper.
- In a mixing bowl, combine the mozzarella and Parmesan cheeses, flour, garlic powder, oregano, and salt. Mix well until the ingredients are fully incorporated.
- Shape the mixture into small balls, about 1 inch in diameter. Dip each ball into the beaten egg, then roll in breadcrumbs to coat.
- Place the coated balls on the prepared baking sheet. Bake for about 15-20 minutes, or until golden brown and crispy.
- Serve warm with marinara sauce on the side for dipping. Enjoy your tasty Baked Parmesan Mozzarella Bites!
Pepperoni Pizza Monkey Bread
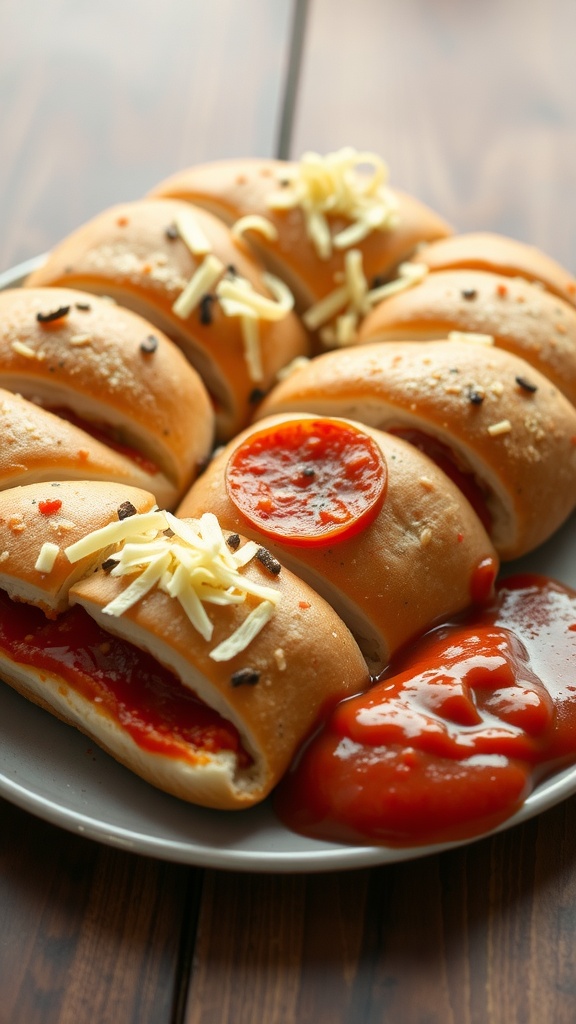
Pepperoni Pizza Monkey Bread is the ultimate game day treat that combines the flavors of pizza with the fun of pull-apart bread! This dish is warm, cheesy, and packed with pepperoni, making it a crowd-pleaser for any gathering. Its easy preparation means you can spend less time in the kitchen and more time enjoying the game with friends and family.
The best part? You can customize it to suit your tastes, adding your favorite pizza toppings or dipping sauces for an extra kick. This recipe is not only simple to make but also delivers a delightful burst of flavor in every bite!
Ingredients
- 2 cans of refrigerated biscuit dough
- 1 cup shredded mozzarella cheese
- 1 cup pepperoni slices
- 1/4 cup pizza sauce
- 1 teaspoon Italian seasoning
- 1/4 cup melted butter
- 1/2 cup grated Parmesan cheese
- Optional: additional pizza toppings (like bell peppers or olives)
Instructions
- Preheat your oven to 350°F (175°C) and grease a bundt pan.
- Cut each biscuit into quarters and place them in a large bowl.
- Add the pepperoni, mozzarella cheese, pizza sauce, Italian seasoning, and half of the Parmesan cheese to the bowl. Toss everything until the biscuit pieces are well-coated.
- Layer the mixture in the greased bundt pan, sprinkling the remaining Parmesan cheese on top.
- Drizzle the melted butter over the top of the mixture.
- Bake for 25-30 minutes or until golden brown and cooked through.
- Allow to cool slightly before flipping the pan onto a serving plate. Serve with extra pizza sauce for dipping.
Crispy Baked Potato Skins
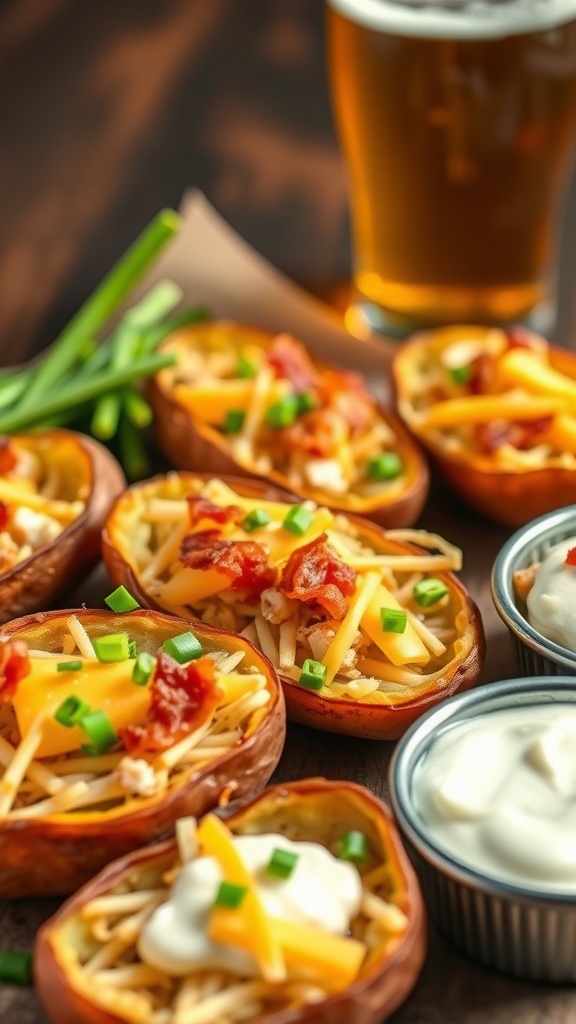
Crispy baked potato skins are the perfect finger food for game day. They are crunchy on the outside and deliciously cheesy on the inside, making them an irresistible treat for any snack table. This recipe is simple to follow, and you’ll have a tasty dish ready in no time!
With a combination of crispy potato skin, melted cheese, and your favorite toppings, these skins offer a wonderful balance of flavors. Serve them with sour cream or your favorite dip, and they will quickly become a crowd favorite!
Ingredients
- 4 large russet potatoes
- 2 tablespoons olive oil
- 1 teaspoon salt
- 1/2 teaspoon black pepper
- 1 cup shredded cheese (cheddar or your choice)
- 1/2 cup cooked and crumbled bacon
- 1/4 cup chopped green onions
- Sour cream for serving
Instructions
- Preheat your oven to 400°F (200°C). Scrub the potatoes thoroughly and prick each one several times with a fork.
- Place the potatoes directly on the oven rack and bake for about 45-60 minutes until tender. Let them cool slightly.
- Once cooled, cut the potatoes in half lengthwise and scoop out some of the flesh, leaving about 1/4 inch of potato on the skin.
- Brush the insides of the potato skins with olive oil and sprinkle with salt and pepper. Place them skin-side up on a baking sheet.
- Bake the potato skins for 10-15 minutes until they are crispy. Then, sprinkle shredded cheese, bacon, and green onions on top and return to the oven for an additional 5 minutes until the cheese is melted.
- Serve hot with sour cream on the side. Enjoy your crispy baked potato skins!
Garlic Parmesan Cheeseburger Bites
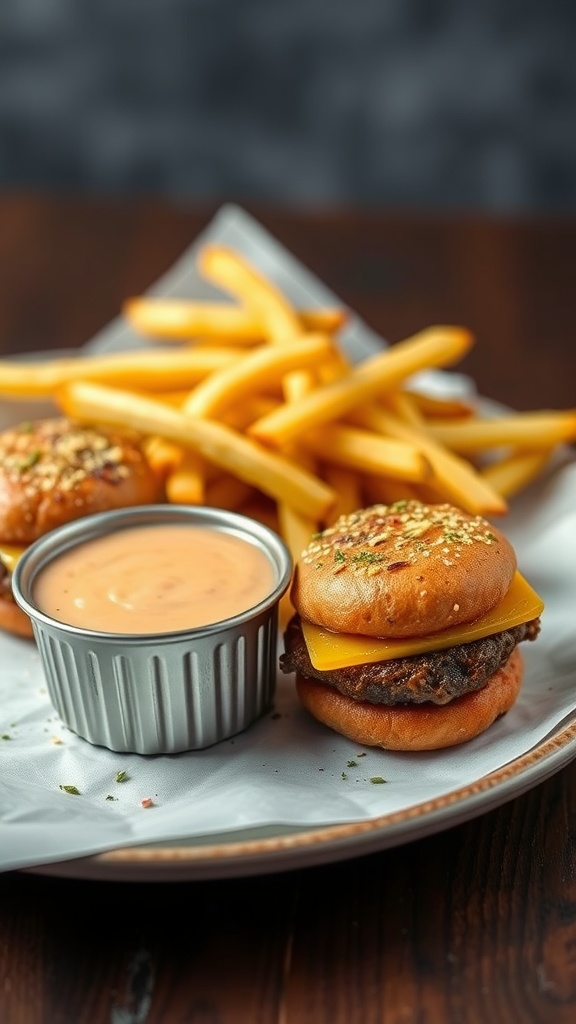
These Garlic Parmesan Cheeseburger Bites are the perfect game day snack! They combine the classic flavors of a cheeseburger with a delicious garlic and Parmesan twist, making them irresistible. These bites are not only easy to prepare but also bursting with taste, making them a hit at any gathering.
Simple to make, these little burgers are perfect for sharing. Plus, they pair beautifully with fries and your favorite dipping sauce. Whether you’re watching the big game or hosting a casual get-together, these bites will be the star of the show!
Ingredients
- 1 pound ground beef
- 1 teaspoon garlic powder
- 1/2 teaspoon onion powder
- Salt and pepper to taste
- 1/2 cup grated Parmesan cheese
- 1/4 cup breadcrumbs
- 1 tablespoon chopped fresh parsley
- 12 small slider buns
- 12 slices of cheddar cheese
- 1/4 cup melted butter
- 1 teaspoon garlic, minced
Instructions
- Preheat your oven to 375°F (190°C).
- In a mixing bowl, combine ground beef, garlic powder, onion powder, salt, pepper, Parmesan cheese, breadcrumbs, and parsley. Form this mixture into bite-sized patties.
- Place the patties on a baking sheet lined with parchment paper and bake for about 15 minutes or until cooked through.
- In a small bowl, mix melted butter with minced garlic. Brush this mixture on the slider buns.
- Once the patties are done, place a slice of cheddar cheese on each patty and return to the oven for an additional 2-3 minutes until the cheese is melted.
- Assemble the bites by placing the patties inside the buns and serve them warm with your favorite sauce and fries!
Mini Pizza Rolls
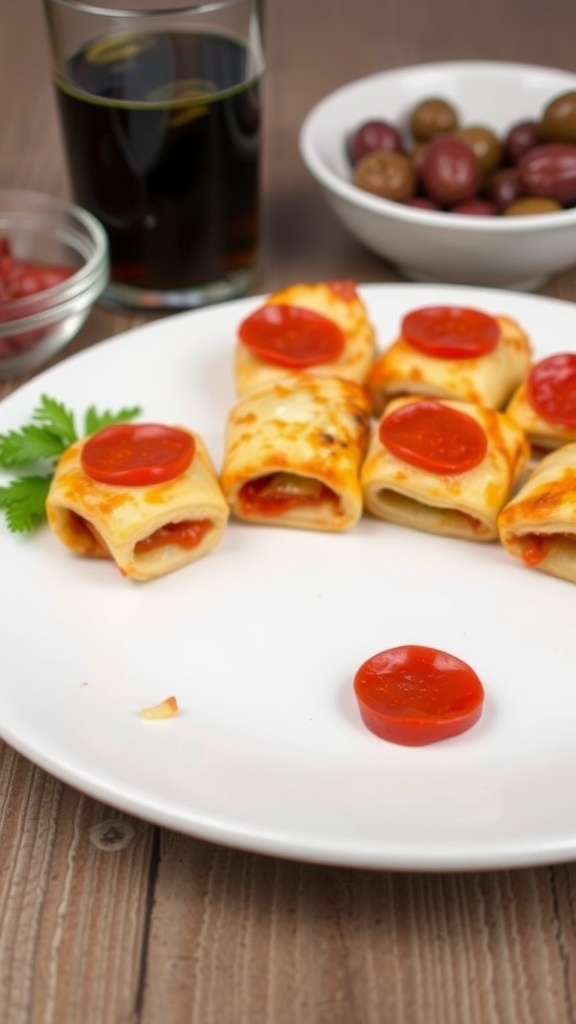
Mini pizza rolls are a fun and tasty snack that everyone will love. These little bites are packed with cheesy goodness and your favorite pizza toppings, all wrapped up in a crispy golden crust. They are perfect for game day, movie nights, or anytime you need a quick, satisfying treat.
Making mini pizza rolls is a breeze, and they can be customized to fit any flavor preference. Whether you like pepperoni, veggies, or just cheese, this recipe is simple and quick enough to whip up in no time!
Ingredients
- 1 package (8 oz) refrigerated pizza dough
- 1 cup shredded mozzarella cheese
- 1/2 cup pepperoni slices
- 1/4 cup pizza sauce
- 1/4 teaspoon dried oregano
- 1 tablespoon olive oil
Instructions
- Preheat your oven to 400°F (200°C) and line a baking sheet with parchment paper.
- On a floured surface, roll out the pizza dough into a rectangle, about 1/4 inch thick.
- Spread the pizza sauce evenly over the dough, leaving a small border around the edges.
- Sprinkle the mozzarella cheese, pepperoni slices, and oregano over the sauce.
- Starting from one edge, roll the dough tightly into a log. Pinch the seams to seal.
- Slice the log into 1-inch pieces and place them cut-side up on the prepared baking sheet.
- Brush the tops with olive oil for a golden finish.
- Bake in the preheated oven for 12-15 minutes or until golden brown and bubbly.
- Let cool for a few minutes before serving with extra pizza sauce for dipping.
Taco Pinwheels
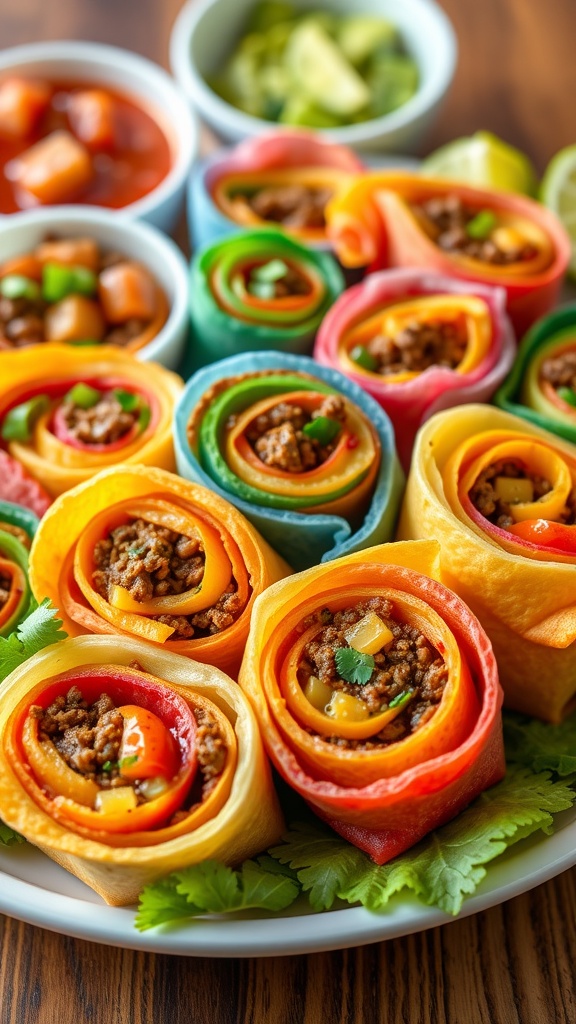
Taco pinwheels are a fun and tasty snack that’s perfect for game day gatherings. They feature a delightful combination of seasoned meat, crunchy veggies, and creamy cheese, all rolled up in colorful tortillas. These bites are not just delicious; they’re simple to prepare, making them an ideal choice for feeding a crowd without spending hours in the kitchen.
With their vibrant colors and zesty flavors, taco pinwheels are sure to impress your guests. Each bite is packed with flavor, and they can be served with salsa or guacamole for a delicious dip. Let’s get started with this easy recipe!
Ingredients
- 4 large tortillas (flour or corn)
- 1 cup cooked and seasoned ground beef or turkey
- 1 cup shredded cheese (cheddar or Mexican blend)
- 1/2 cup diced bell peppers (red, green, or yellow)
- 1/2 cup diced tomatoes
- 1/4 cup chopped green onions
- 1/4 cup sour cream
- 1 tablespoon taco seasoning
Instructions
- Prepare the Filling: In a bowl, combine the cooked meat, taco seasoning, cheese, bell peppers, tomatoes, and green onions. Mix well to ensure everything is evenly coated.
- Spread the Mixture: Lay one tortilla flat on a clean surface. Spread a layer of sour cream over the entire tortilla, followed by a generous portion of the meat and veggie mixture.
- Roll It Up: Starting from one end, carefully roll the tortilla tightly to enclose the filling. Repeat with the remaining tortillas.
- Slice and Serve: Using a sharp knife, cut each rolled tortilla into bite-sized pinwheels. Arrange them on a serving platter and enjoy with your favorite dips!
Cheeseburger Bombs
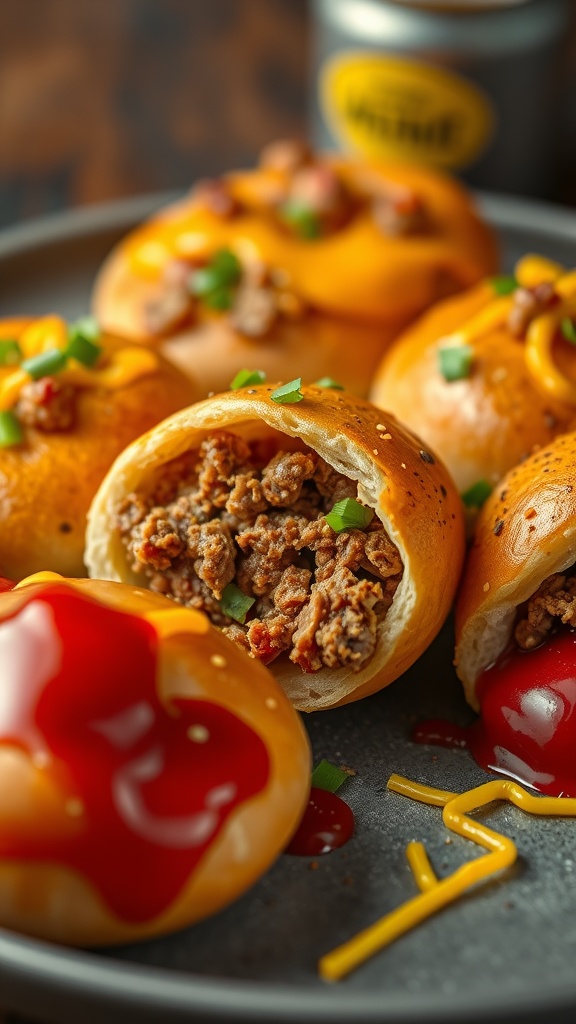
Cheeseburger Bombs are a fun and delicious way to enjoy the classic flavors of a cheeseburger in a handheld bite. These little bites pack a flavorful punch with seasoned ground beef, melty cheese, and warm, soft dough. They’re perfect for game day or any casual gathering, and they are surprisingly easy to make!
With just a few simple ingredients, you can whip up these tasty treats in no time. Everyone will love the gooey cheese and savory beef wrapped in a golden, flaky crust. Serve them with your favorite dipping sauces, and watch them disappear!
Ingredients
- 1 pound ground beef
- 1 cup shredded cheddar cheese
- 1/2 cup diced onions
- 1 teaspoon garlic powder
- 1 teaspoon salt
- 1/2 teaspoon black pepper
- 1 can refrigerated biscuit dough
- Ketchup and mustard for serving
Instructions
- Preheat the oven to 375°F (190°C).
- In a skillet, cook the ground beef over medium heat. Add diced onions, garlic powder, salt, and pepper. Cook until the beef is browned and the onions are translucent. Drain excess fat.
- Stir in the shredded cheddar cheese until melted and combined. Remove from heat.
- Take a biscuit from the can and flatten it into a circle. Place a spoonful of the beef and cheese mixture in the center.
- Fold the biscuit dough over the filling and pinch to seal. Place seam-side down on a baking sheet.
- Bake for 12-15 minutes or until golden brown. Serve hot with ketchup and mustard.
Football Cheese Dip
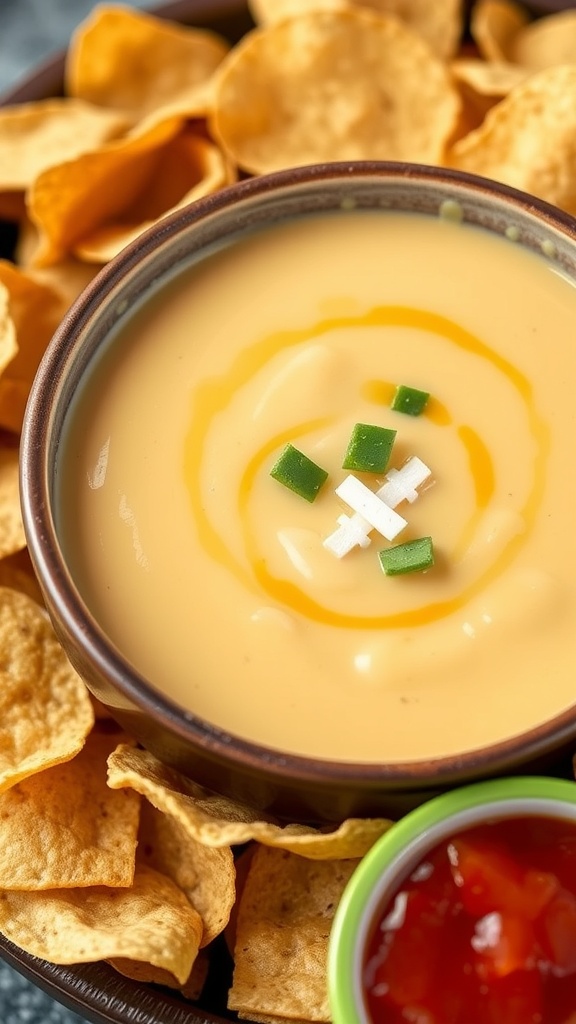
Football Cheese Dip is the ultimate snack for game day gatherings. This creamy, cheesy delight is packed with flavor and pairs perfectly with tortilla chips or crackers. The combination of melted cheese and spices makes it irresistibly tasty and a crowd-pleaser that everyone will enjoy.
What’s great about this recipe is how simple it is to prepare. With just a few ingredients, you can whip up this delicious dip in no time. Serve it warm in a football-themed bowl for a fun touch, and watch your guests dive in!
Ingredients
- 2 cups shredded cheddar cheese
- 1 cup cream cheese, softened
- 1/2 cup sour cream
- 1/2 cup diced tomatoes with green chilies
- 1 teaspoon garlic powder
- 1 teaspoon onion powder
- 1/2 teaspoon cumin
- 1/4 teaspoon cayenne pepper (optional)
- Salt to taste
- Tortilla chips for serving
Instructions
- In a medium saucepan, combine cream cheese, sour cream, and shredded cheddar over medium heat. Stir until the cheeses start to melt and blend together.
- Add in the diced tomatoes, garlic powder, onion powder, cumin, cayenne pepper, and salt. Stir well and cook until heated through and creamy, about 5-7 minutes.
- Transfer the mixture to a serving bowl and keep warm. Serve with tortilla chips for dipping.
Loaded Cowboy Cheese Dip
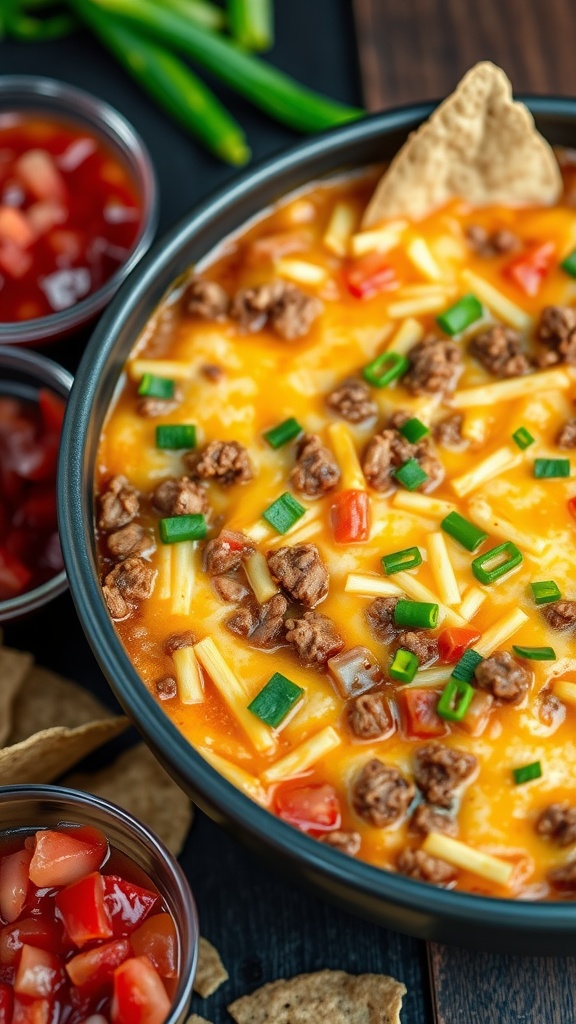
Loaded Cowboy Cheese Dip is the perfect game day snack. This creamy, savory dip combines rich cheese with seasoned beef, fresh veggies, and a burst of flavor that makes it irresistible. It’s simple to whip up, requiring just a few ingredients and minimal prep time, making it ideal for those last-minute gatherings or parties.
This dip is a crowd-pleaser that pairs wonderfully with tortilla chips, crackers, or even fresh veggies. The blend of gooey cheese, hearty meat, and zesty toppings will keep everyone coming back for more. Serve it warm, and watch it disappear!
Ingredients
- 1 pound ground beef
- 1 packet taco seasoning
- 8 ounces cream cheese, softened
- 1 cup shredded cheddar cheese
- 1 cup shredded Monterey Jack cheese
- 1/2 cup diced tomatoes
- 1/4 cup chopped green onions
- 1/4 cup jalapeños, sliced (optional)
- Tortilla chips for serving
Instructions
- In a skillet over medium heat, brown the ground beef. Drain excess fat and stir in the taco seasoning, cooking according to package instructions.
- In a large mixing bowl, combine the cooked beef, cream cheese, cheddar cheese, and Monterey Jack cheese. Mix until well combined.
- Transfer the mixture to a baking dish and spread evenly. Bake in a preheated oven at 350°F (175°C) for 20-25 minutes, or until bubbly and golden on top.
- Remove from the oven and top with diced tomatoes, chopped green onions, and jalapeños if using.
- Serve warm with tortilla chips for dipping.
Freezer Potato Skins

Freezer potato skins are a fantastic game day snack that’s both easy to make and bursting with flavor. These crispy, cheesy bites are the perfect finger food for any gathering, offering a delightful crunch with every bite. Plus, you can prepare them ahead of time and just pop them in the oven when you’re ready to serve!
With a simple blend of ingredients, these potato skins are a hit for both kids and adults. They are loaded with cheese, crispy bacon, and fresh chives, making them a savory treat that will keep your guests coming back for more. Here’s how to whip up your own batch that you can freeze and enjoy anytime!
Ingredients
- 4 large russet potatoes
- 1 cup shredded cheddar cheese
- 1/2 cup cooked and crumbled bacon
- 1/4 cup sour cream
- 2 tablespoons chopped fresh chives
- Salt and pepper to taste
- Olive oil for brushing
Instructions
- Preheat your oven to 400°F (200°C). Scrub the potatoes and pierce them several times with a fork. Bake the potatoes directly on the oven rack for about 45-60 minutes, or until tender.
- Once baked, let the potatoes cool slightly, then slice them in half lengthwise. Carefully scoop out some of the flesh, leaving a small border to maintain the skin’s integrity.
- Brush the insides of the potato skins with olive oil and sprinkle with salt and pepper. Place them back in the oven for an additional 10-15 minutes until they are crispy.
- Remove the skins from the oven and fill them with cheese and bacon. Return to the oven for another 5-10 minutes, until the cheese is melted and bubbly.
- Top with sour cream and chives before serving. To freeze, allow the skins to cool completely, then store in an airtight container or freezer bag.
Velveeta Cheese Dip
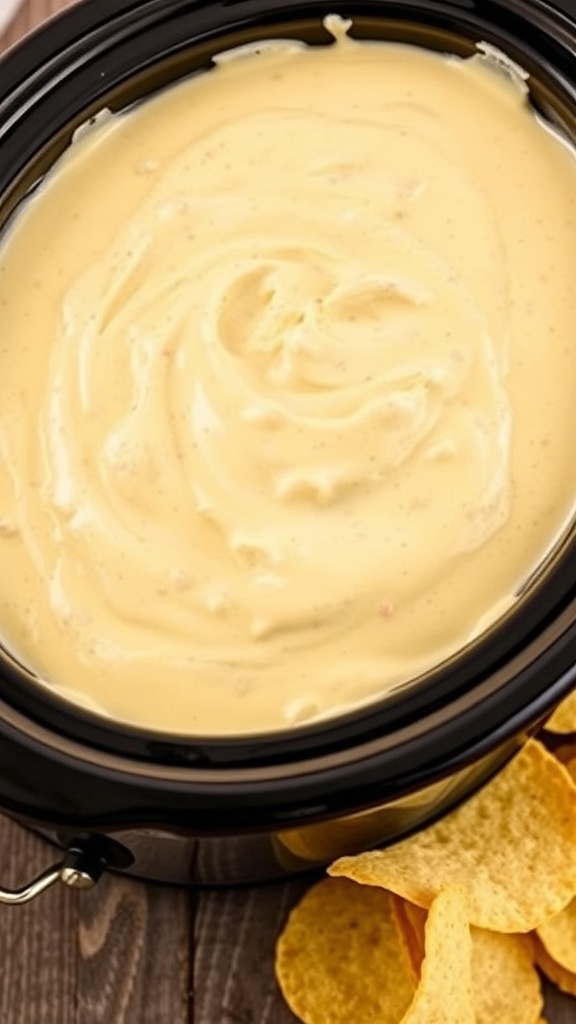
Velveeta cheese dip is a creamy and cheesy delight that’s perfect for game day gatherings. It’s smooth, rich, and full of flavor, making it an ideal companion for tortilla chips, pretzels, or veggies. The best part is, it’s so simple to prepare that even novice cooks can whip it up in no time!
This dip is all about that cheesy goodness, with the Velveeta melting into a silky texture that’s hard to resist. Whether you’re cheering for your team or just enjoying a movie night, this dip will keep everyone happy and craving more.
Ingredients
- 1 lb Velveeta cheese, cubed
- 1 can (10 oz) diced tomatoes with green chilies, undrained
- 1/2 cup milk
- 1 teaspoon chili powder (optional)
- Tortilla chips for serving
Instructions
- In a medium saucepan over low heat, combine the Velveeta cheese, diced tomatoes, and milk. Stir frequently until the cheese is completely melted and the mixture is smooth.
- If you like a little kick, stir in the chili powder to taste.
- Once the dip is ready, transfer it to a serving bowl and enjoy with tortilla chips!
Monkey Bread
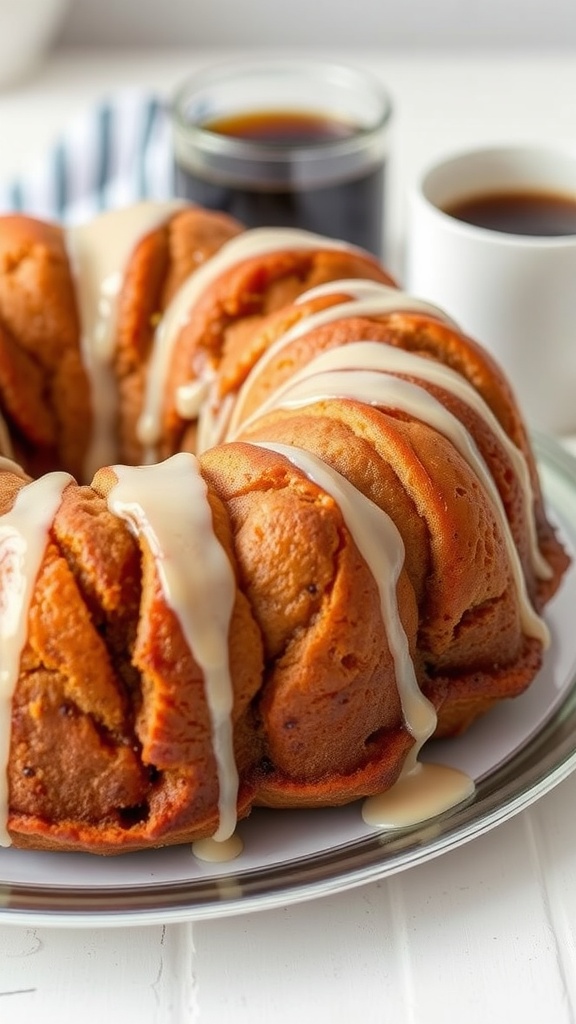
Monkey bread is a fun and delicious treat that’s perfect for game day. This pull-apart bread is soft, sweet, and coated in a sticky glaze, making it a hit for both kids and adults. It’s easy to make, and the best part is that it can be shared among friends while you cheer for your favorite team.
The comforting flavors of cinnamon and sugar create a delightful combination that everyone will love. Whether served warm or at room temperature, monkey bread is sure to be a crowd-pleaser at your gathering.
Ingredients
- 2 cans (16.5 oz each) refrigerated biscuit dough
- 1 cup granulated sugar
- 2 teaspoons ground cinnamon
- 3/4 cup unsalted butter, melted
- 1/2 cup brown sugar, packed
- 1 teaspoon vanilla extract
Instructions
- Preheat the oven to 350°F (175°C). Grease a bundt pan with cooking spray.
- In a large bowl, mix granulated sugar and cinnamon together. Cut each biscuit into quarters and toss them in the cinnamon sugar mixture until coated.
- In another bowl, combine melted butter, brown sugar, and vanilla extract. Pour half of this mixture into the bottom of the bundt pan.
- Layer half of the biscuit pieces in the pan, then pour half of the remaining butter mixture over them. Repeat with the rest of the biscuits and butter mixture.
- Bake for 30-35 minutes until golden brown. Let cool for 10 minutes before inverting the pan onto a serving plate. Serve warm and enjoy!
Chickpea Curry
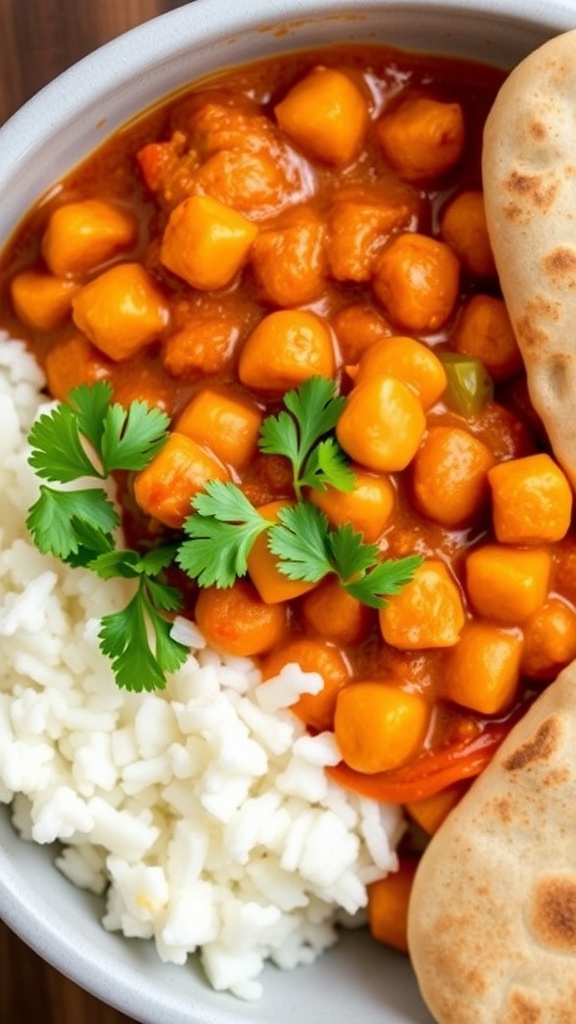
Chickpea curry is a warm and comforting dish that’s perfect for game day gatherings. With its rich blend of spices and creamy texture, it’s both hearty and satisfying. Plus, it’s simple to whip up, making it an ideal choice for those busy days when you want something delicious without spending hours in the kitchen.
This delightful curry will tantalize your taste buds with its savory flavors. The chickpeas provide a great source of protein, while the spices create a wonderful aroma that fills the room. Serve it over rice or with some naan for a complete meal that everyone will love!
Ingredients
- 2 cans chickpeas, drained and rinsed
- 1 tablespoon olive oil
- 1 onion, chopped
- 3 garlic cloves, minced
- 1 tablespoon ginger, grated
- 1 can diced tomatoes
- 1 can coconut milk
- 2 teaspoons curry powder
- 1 teaspoon cumin
- 1/2 teaspoon turmeric
- Salt and pepper to taste
- Fresh cilantro for garnish
Instructions
- Heat olive oil in a large pot over medium heat. Add chopped onion and sauté until translucent.
- Stir in garlic and ginger, cooking for another minute until fragrant.
- Add the diced tomatoes and cook for a few minutes, then stir in the chickpeas and spices.
- Pour in the coconut milk and bring the mixture to a simmer. Let it cook for about 15 minutes, stirring occasionally.
- Season with salt and pepper. Serve hot, garnished with fresh cilantro, alongside rice or naan.
Garlic Parmesan Cheeseburger Balls
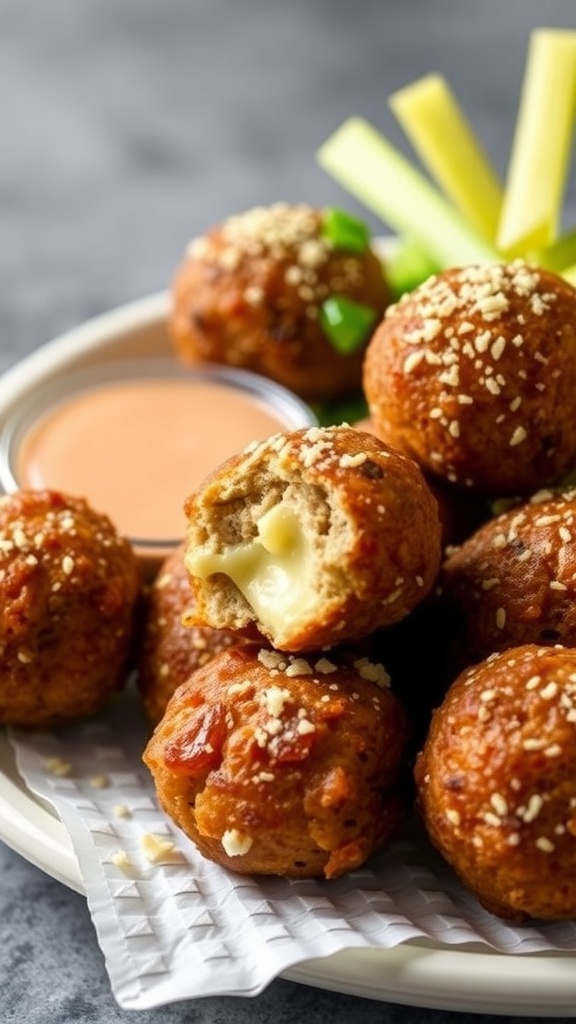
Garlic Parmesan Cheeseburger Balls are a tasty twist on classic game day snacks. These bite-sized treats are packed with savory flavors and gooey cheese, making them perfect for sharing during your favorite sporting events. With a crispy exterior and a soft, cheesy center, they bring a deliciously satisfying crunch that everyone will love.
The best part? They’re super easy to make! You can whip up a batch in no time, and they’re bound to be a hit at any gathering. Serve them with your favorite dipping sauce for an extra kick!
Ingredients
- 1 pound ground beef
- 1 cup breadcrumbs
- 1/2 cup grated Parmesan cheese
- 3 cloves garlic, minced
- 1 teaspoon onion powder
- 1 teaspoon salt
- 1/2 teaspoon black pepper
- 1/2 teaspoon smoked paprika
- 1 cup shredded mozzarella cheese
- 1/4 cup fresh parsley, chopped
- 1/4 cup ketchup (for dipping)
Instructions
- Preheat your oven to 400°F (200°C) and line a baking sheet with parchment paper.
- In a large bowl, mix together the ground beef, breadcrumbs, Parmesan cheese, minced garlic, onion powder, salt, black pepper, and smoked paprika until well combined.
- Take a small amount of the mixture and flatten it in your hand. Place a small piece of mozzarella cheese in the center, then fold the meat around the cheese to form a ball. Repeat with the remaining mixture.
- Place the formed balls on the prepared baking sheet, spacing them out evenly.
- Bake for 20-25 minutes, or until the balls are cooked through and golden brown on the outside.
- Serve warm with ketchup for dipping and enjoy your game day feast!
Stuffed Dough Balls
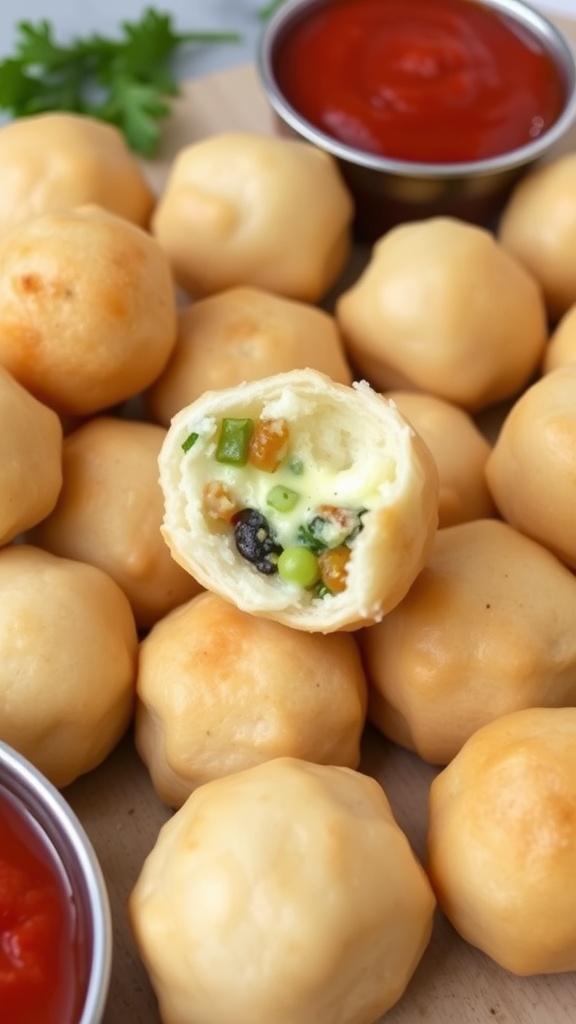
Stuffed dough balls are a delightful treat, perfect for game day snacking. These little bites are filled with a savory mixture, making them both comforting and satisfying. With a crispy exterior and a warm, flavorful filling, they are sure to be a hit with your friends and family.
Making stuffed dough balls is simple and fun, making it a great recipe for both novice and experienced cooks. You can customize the filling with your favorite ingredients, whether it’s cheese, veggies, or meats. They are perfect for dipping in sauces, adding another layer of flavor to each bite!
Ingredients
- 2 cups all-purpose flour
- 1 teaspoon active dry yeast
- 1 teaspoon sugar
- 1/2 teaspoon salt
- 3/4 cup warm water
- 1 tablespoon olive oil
- 1 cup mixed vegetables (like peas, carrots, and corn)
- 1/2 cup shredded cheese
- Ketchup or your favorite dipping sauce
Instructions
- Prepare the Dough: In a bowl, mix warm water, sugar, and yeast. Let it sit for 5 minutes until frothy. Add flour, salt, and olive oil. Stir to form a dough.
- Knead the Dough: On a floured surface, knead the dough for 5-7 minutes until smooth. Place in a greased bowl, cover, and let rise for about 1 hour.
- Make the Filling: In a separate bowl, combine mixed vegetables and cheese. Season to taste.
- Shape the Dough Balls: Once the dough has risen, divide it into small portions. Flatten each piece, add a spoonful of the filling, and seal the edges to form a ball.
- Cook the Dough Balls: Heat oil in a frying pan over medium heat. Fry the dough balls until golden brown on all sides. Drain on paper towels.
- Serve: Enjoy warm with ketchup or your favorite dipping sauce!
Pizza Hawaiian Rolls

Pizza Hawaiian Rolls are a fun and easy twist on traditional pizza, perfect for game day snacks or casual gatherings. These delightful rolls are soft and fluffy, topped with savory pizza sauce, gooey cheese, and your favorite toppings, ensuring a satisfying bite every time.
Making these rolls is simple and quick, requiring minimal prep time. You’ll love how they combine the classic flavors of pizza into a portable, bite-sized treat that everyone will enjoy. Serve them warm with a side of dipping sauce for an extra flavor boost!
Ingredients
- 12 Hawaiian rolls
- 1 cup pizza sauce
- 2 cups shredded mozzarella cheese
- 1 cup sliced pepperoni
- 1/2 cup diced green onions
- 1/4 cup grated Parmesan cheese
Instructions
- Preheat your oven to 350°F (175°C).
- Arrange the Hawaiian rolls in a baking dish, keeping them connected in a rectangular shape.
- Spread pizza sauce evenly over the top of each roll.
- Sprinkle mozzarella cheese generously over the sauce.
- Add pepperoni slices and a sprinkle of green onions on top.
- Finish with a light dusting of Parmesan cheese.
- Bake in the preheated oven for 15-20 minutes, or until the cheese is bubbly and golden.
- Remove from the oven, let cool slightly, and serve warm with additional pizza sauce for dipping.
Finger Foods and Dips
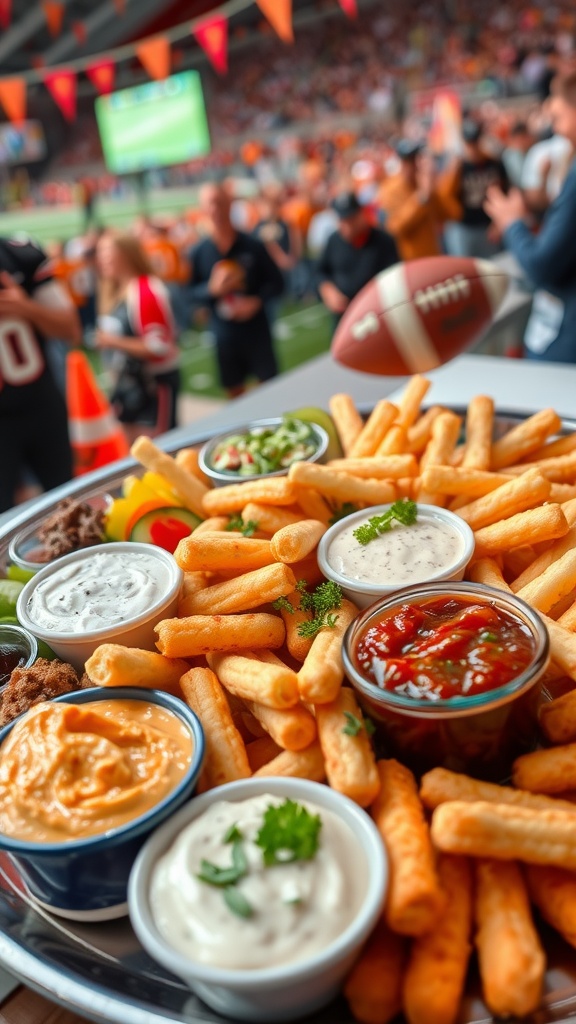
Finger foods and dips are the ultimate game day treat! They’re easy to prepare, delicious, and perfect for sharing with friends while watching the big game. Think crispy snacks paired with a variety of tasty dips to please everyone’s palate. From zesty to creamy, these flavors will keep everyone coming back for more!
One crowd-pleaser is loaded cheese fries served with a trio of dips. The combo of cheesy, crispy fries with dips like ranch, salsa, and a spicy cheese sauce creates a fun and flavorful spread that’s perfect for any gathering. It’s simple to make and can be customized with your favorite toppings!
Ingredients
- 4 large russet potatoes
- 2 cups shredded cheddar cheese
- 1/2 cup sour cream
- 1/4 cup ranch dressing
- 1 cup salsa
- 1/2 teaspoon chili powder
- 1 tablespoon olive oil
- Salt and pepper to taste
- Chopped green onions for garnish
Instructions
- Prepare the Potatoes: Preheat the oven to 425°F (220°C). Wash and cut the potatoes into thin strips. Toss them with olive oil, salt, and pepper.
- Bake the Fries: Spread the fries in a single layer on a baking sheet. Bake for 30-35 minutes, flipping halfway through, until golden brown and crispy.
- Add Cheese: Remove the fries from the oven and sprinkle the shredded cheese on top. Return to the oven for an additional 5 minutes, or until the cheese is melted.
- Prepare the Dips: While the fries are baking, mix the sour cream and ranch dressing in a bowl. In another bowl, combine salsa with chili powder for a spicy kick.
- Serve: Once the fries are ready, top with chopped green onions, and serve immediately with the dips on the side!
Board Appetizers
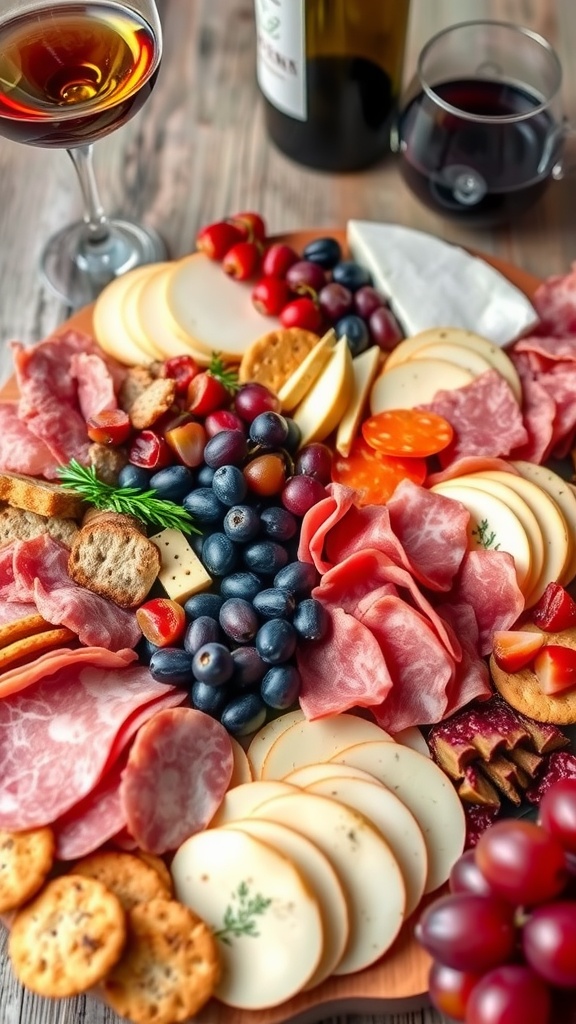
Create the ultimate board appetizer for your game day gathering! This platter is a crowd-pleaser, combining savory meats, creamy cheeses, and fresh fruits for a mix of flavors and textures.
It’s simple to assemble, making it perfect for anyone looking to impress without spending hours in the kitchen. Just arrange your ingredients, and you’re ready to enjoy the game!
Ingredients
- 1 cup assorted cured meats (salami, prosciutto, and pepperoni)
- 1 cup assorted cheeses (cheddar, gouda, and brie)
- 1 cup crackers and breadsticks
- 1 cup fresh fruit (grapes and blueberries)
- 1/2 cup mixed nuts
- 1 tablespoon fresh herbs (like rosemary or thyme, for garnish)
Instructions
- Gather your Ingredients: Choose a large serving board or platter and gather all your ingredients.
- Arrange the Meats: Start by placing the cured meats in different sections of the board, folding them for a nice presentation.
- Add the Cheeses: Next, cut or slice the cheeses and arrange them around the meats.
- Fill with Crackers: Add crackers and breadsticks in the gaps, creating a colorful display.
- Include Fresh Fruits: Scatter the grapes and blueberries around the board for sweetness.
- Add Nuts and Herbs: Finish by adding mixed nuts and garnishing with fresh herbs. Serve with your favorite dips if desired.
Tailgate Sliders with Hawaiian Rolls
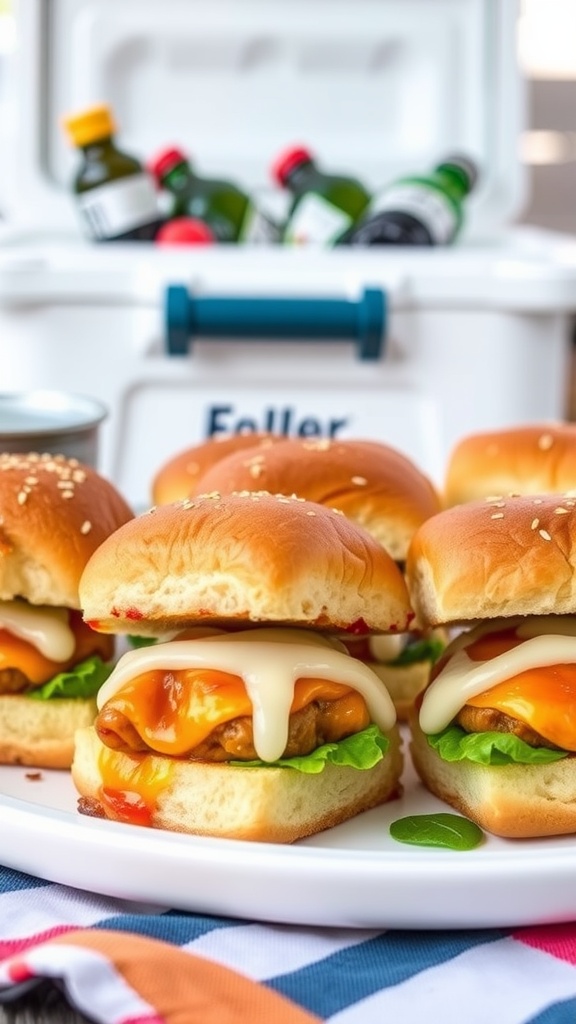
Tailgate sliders made with Hawaiian rolls are the perfect blend of sweetness and savory goodness. These bite-sized sandwiches are not only delicious but also incredibly easy to whip up, making them a hit for game day gatherings or any casual get-together.
Each slider is filled with juicy meat, melted cheese, and a mix of your favorite condiments, all hugged by soft, slightly sweet Hawaiian rolls. They’re simple to prepare and can be made in bulk, ensuring there’s enough to keep everyone satisfied while cheering for their team.
Ingredients
- 12 Hawaiian rolls
- 1 pound ground beef or turkey
- 1 cup shredded cheddar cheese
- 1/2 cup mayonnaise
- 1/4 cup ketchup
- 1 teaspoon garlic powder
- 1 teaspoon onion powder
- Salt and pepper to taste
- 1/2 cup shredded lettuce
- Pickles (optional)
Instructions
- Preheat your oven to 350°F (175°C). Line a baking dish with parchment paper.
- In a large bowl, combine ground meat, garlic powder, onion powder, salt, and pepper. Form into small patties, about the size of the rolls.
- Cook the patties in a skillet over medium heat until browned and cooked through, about 5-7 minutes per side. Just before they finish cooking, place a slice of cheddar cheese on each patty to melt.
- While the patties cook, slice the Hawaiian rolls in half, keeping them connected. Spread mayonnaise and ketchup on the inside of the rolls.
- Once cooked, place the patties on the bottom half of the rolls. Top with shredded lettuce and pickles if desired, then place the top half of the rolls back on.
- Wrap the entire tray in aluminum foil and bake for 10-15 minutes until everything is heated through and the rolls are slightly toasted. Serve warm and enjoy your game day!
Tailgate Dip Recipes
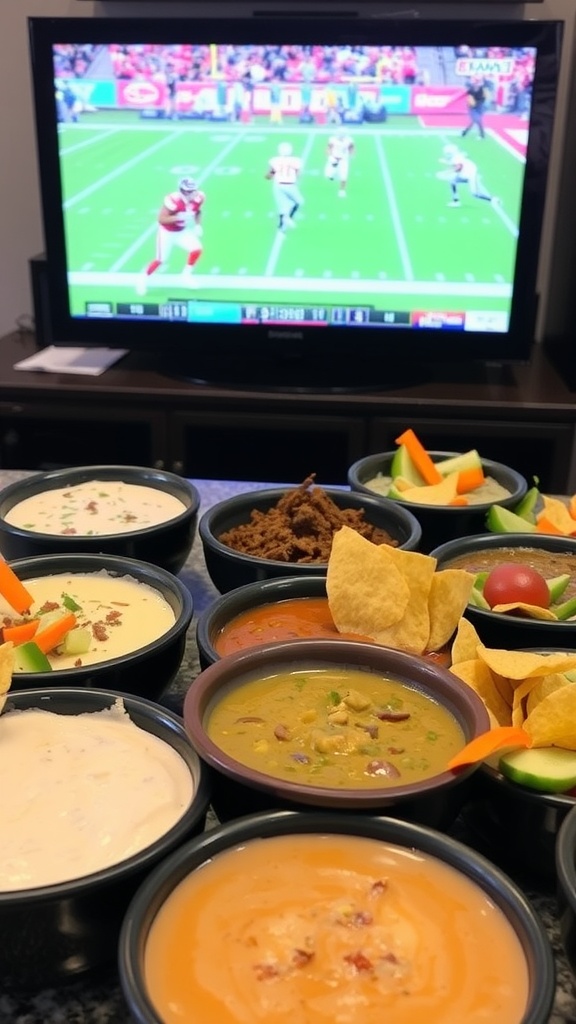
Game day is incomplete without a tasty selection of dips that keep everyone coming back for more. These dips are not only easy to prepare, but they also pack a punch of flavor that pairs perfectly with chips, veggies, or whatever your heart desires. Whether you’re a fan of creamy, spicy, or savory, there’s a dip that will fit your taste.
One of the simplest yet crowd-pleasing options is a classic seven-layer dip. This dip combines layers of refried beans, guacamole, sour cream, salsa, shredded cheese, olives, and green onions. Not only does it look impressive, but it’s also a delightful mix of textures and tastes that will make it a hit at your tailgate party.
Ingredients
- 1 can refried beans
- 1 large avocado (mashed)
- 1 cup sour cream
- 1 cup salsa
- 1 cup shredded cheese (cheddar or Mexican blend)
- 1/2 cup black olives (sliced)
- 1/4 cup green onions (chopped)
- Chips or veggies for dipping
Instructions
- Start by spreading the refried beans evenly on the bottom of a large dish or platter.
- Add a layer of mashed avocado on top of the beans, smoothing it out.
- Next, spread the sour cream over the avocado layer, followed by a generous layer of salsa.
- Sprinkle the shredded cheese evenly on top.
- Finish with a layer of sliced black olives and chopped green onions.
- Serve with chips or fresh veggies and enjoy your game day!
